This post may contain affiliate links. Please read our disclosure policy.
I’m back with some more photography talk! This is a long one but a GOOD one (twss?) so grab a warm drink and tucker in for some learning.
Food photography is by far my favorite part about food blogging, but when first starting out, it can also be the MOST frustrating part. I’ve been getting a big influx of photography questions lately and one of my biggest pieces of advice is always to LEARN MANUAL MODE on your DSLR camera. Seriously, it will change your life. That’s what we’re here to talk about today.
I’ve had a DSLR for 3 years and had very little photography experience before that. I’m still learning new things daily but I like to think that I’ve really mastered the basics of manual mode, especially when it comes to food photography. The way that I shoot doesn’t necessarily work for everyone (I’ll explain that more later) but I know a lot of easy adjustments to make manual mode work for you.
This post focuses primarily on the exposure triangle and how to manipulate light to produce beautiful images with the look that you want.
Shooting in manual mode quite simply gives you more control over your environment and the light that is let into your camera. If your subject is moving really fast, you can adjust the shutter speed so that you are able to freeze their motion in place. Or maybe you want there to be some blur in the photo to show the movement of the subject (for example, the flow of a waterfall). There are many reasons why you would want to manipulate the lighting in a photo and manual mode allows you to do that.
Let’s look at an example of manual mode vs the auto settings on my DSLR camera. The picture on the left was taken using the auto settings on my camera and the picture on the right was taken using my manual settings.
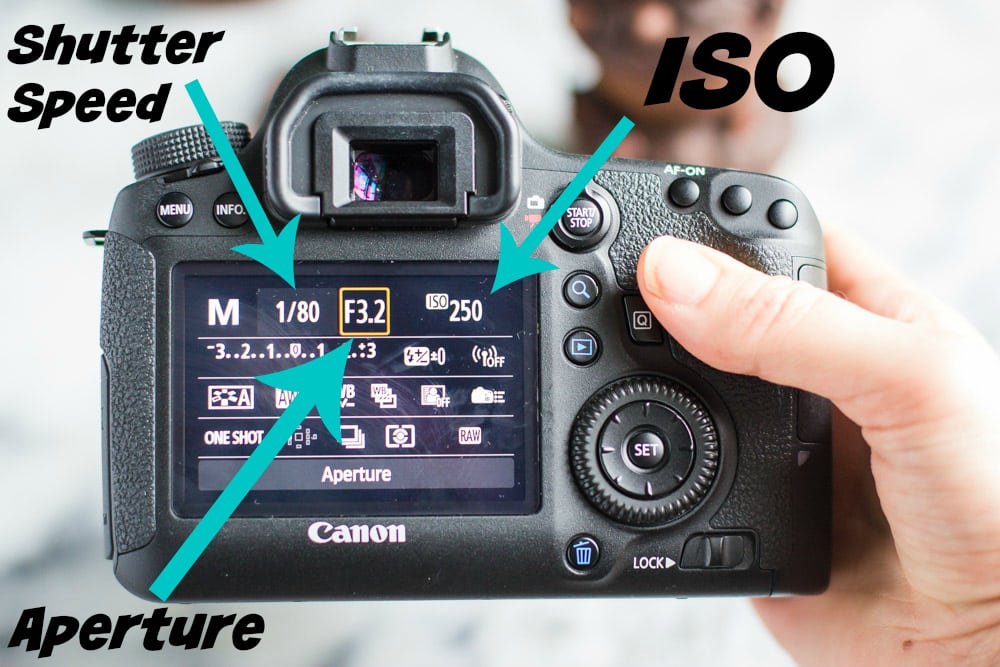
There are 3 main settings that you will adjust in order to take great photos in manual mode: 1) shutter speed 2) aperture and 3) ISO. Learning to manipulate these settings in relation to each other will result in beautiful and unique photos even under harsh lighting circumstances.
Let’s break all of these down.
This is simply the speed at which your camera takes the picture. The faster the trigger fires, the less light that is able to get into the photo and vice versa. The number, for example 1/100, means that your camera is taking the photo at a rate of 1/100th of a second.
There are a few things to consider when choosing a shutter speed:
a) Light. A lower shutter speed means that MORE light is being let into the camera so your picture will have better lighting. A higher shutter speed means that the photo is being taken faster, the shutter isn’t open as long, and less light is getting in which results in a darker photo.
b) Motion. Is your subject moving? If you’re shooting still objects such as food, motion isn’t something that you will have to worry about much at all. However, if you’re shooting your kids playing outside, you’re going to need a shutter speed that is much faster and that can freeze the motion (this would be something like 1/400+).
Sometimes I shoot “action” shots with my food photography such as pouring syrup over pancakes. In this instances, I would bump up my shutter speed just a bit to maybe 1/250 in order to capture the slight motion of the syrup.
c) Shaking. If you have shaky hands (even just a little bit), that could show in your photos. I suggest just experimenting with this to learn how your hands are with a camera in them. I must have very steady hands because I shoot with a lower shutter speed than most and rarely notice shake in my photos. I know others, however, that will only shoot food photography using a tripod because their hands are a bit too shaky. If shake is a problem for you, you can either go with a higher shutter speed so that the picture is being taken fast enough not to capture the shaking of your hand OR you can use a tripod and a remote so that there is little to no shaking.
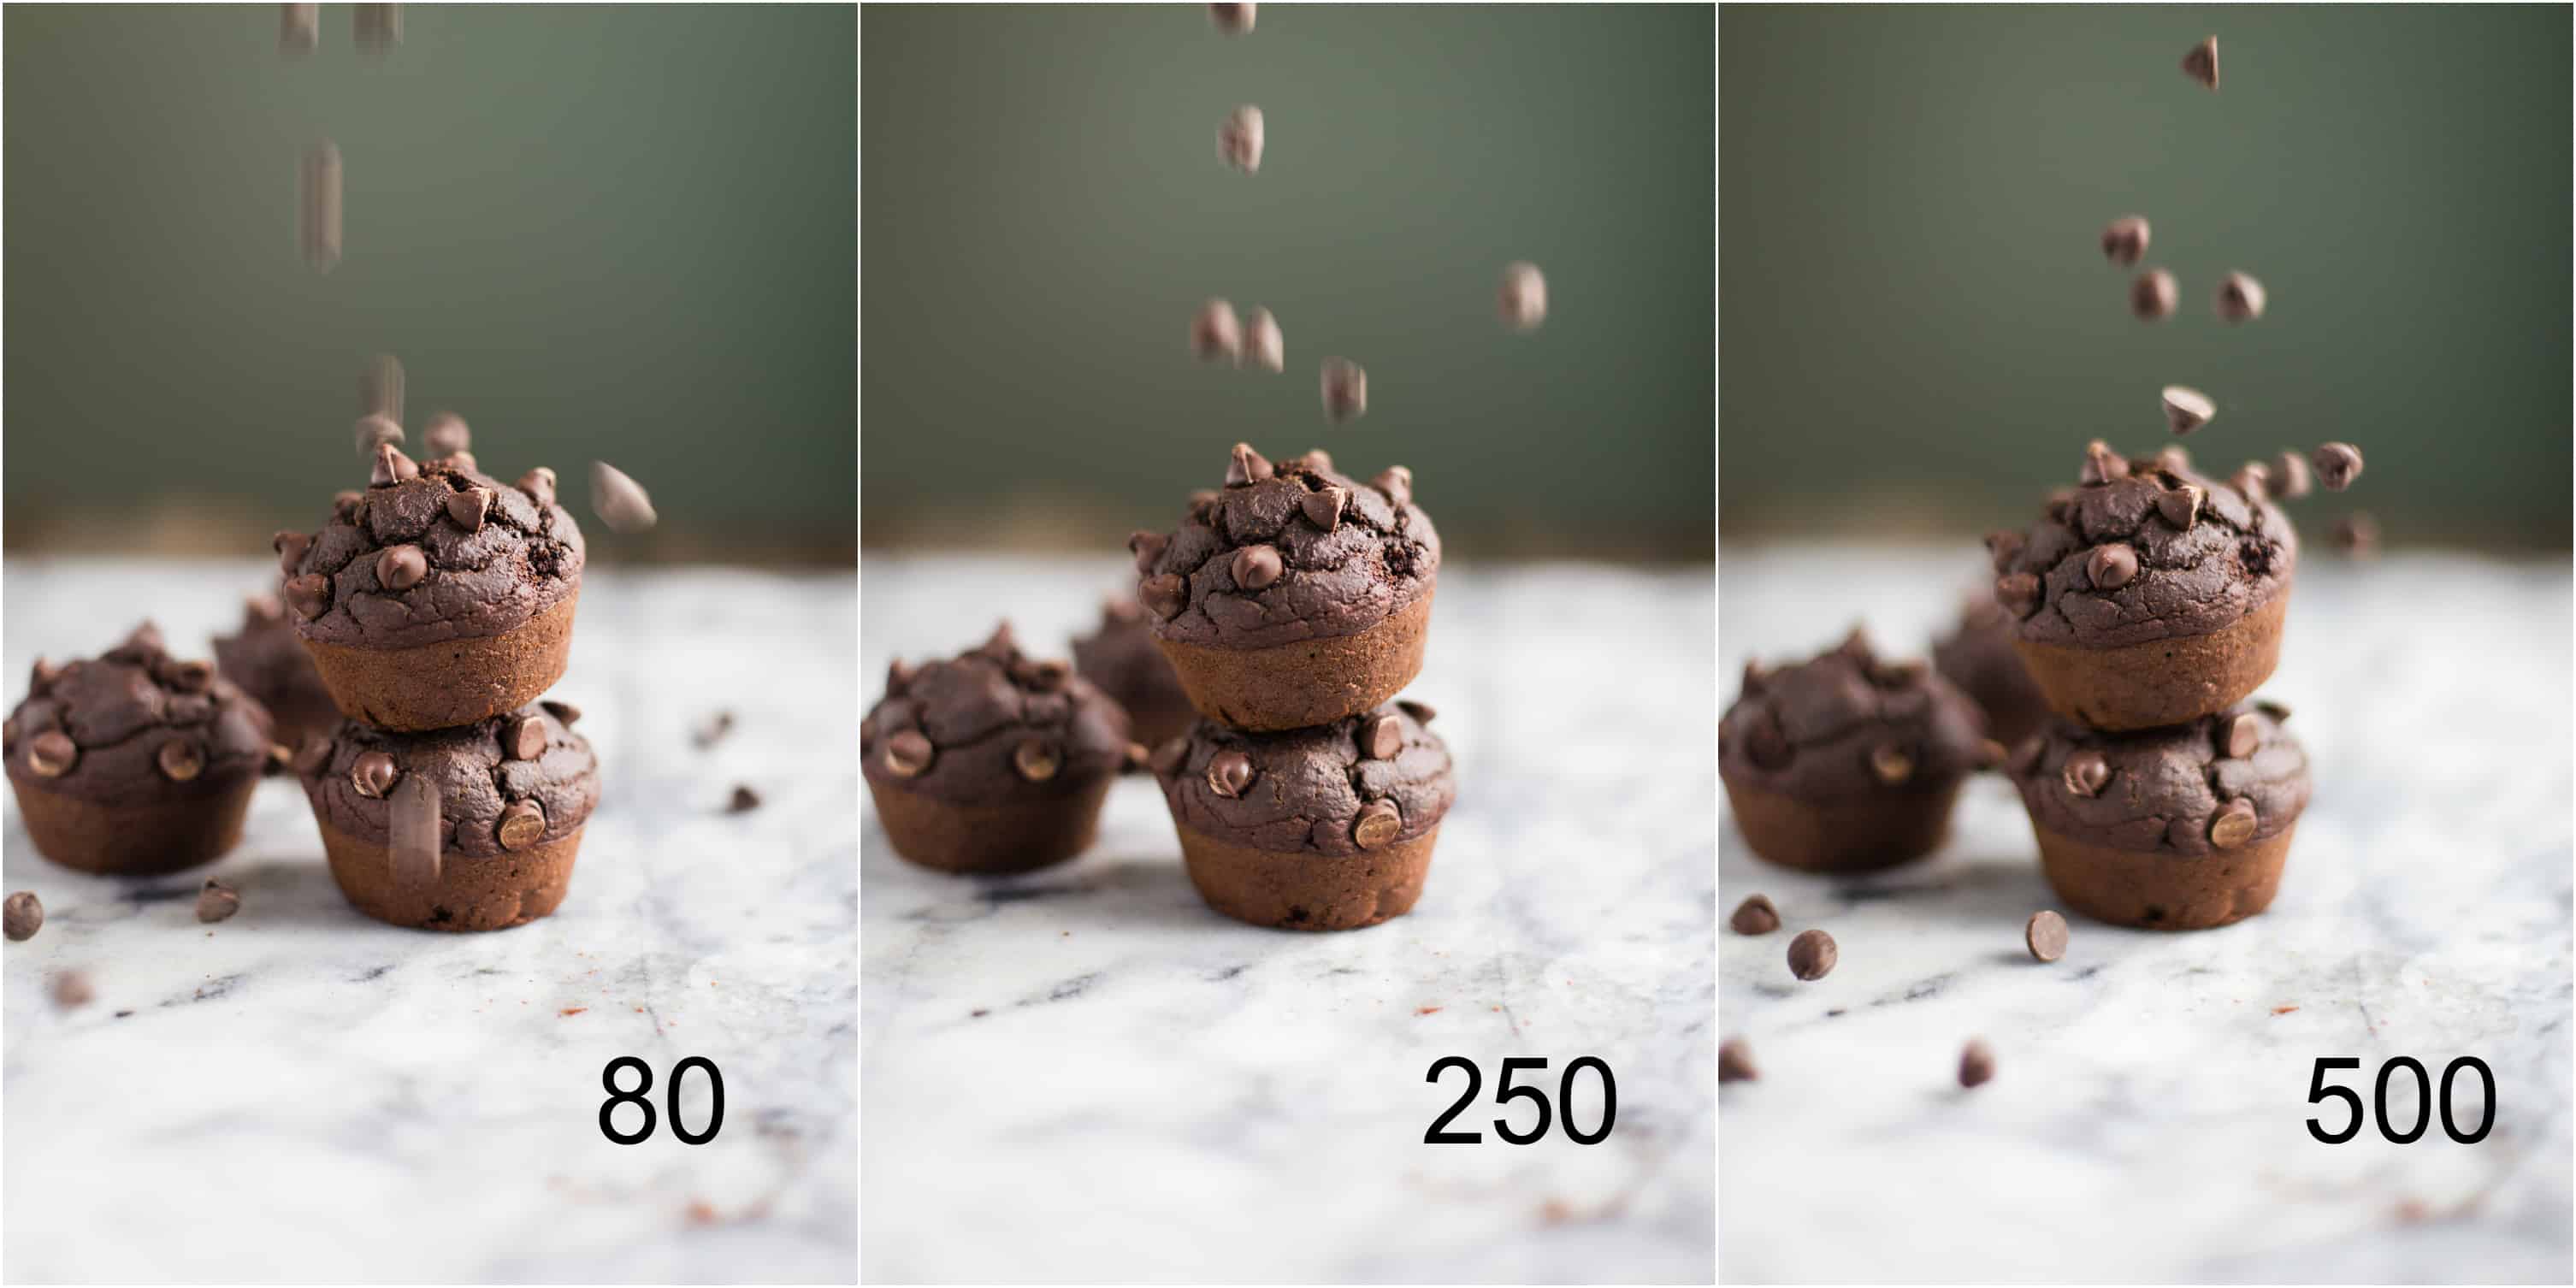
In the below example, a shutter speed of 1/80 really provides motion to the photo to emphasize that the chocolate chips are falling. 1/500, however, freezes the chocolate chips in place. It’s obvious that they’re falling but there’s less motion in the photo. NOTE that when I adjusted the shutter speed for these photos, I also adjusted the ISO and aperture in order to keep the light in the photo generally the same.
PS- this amazing muffin recipe is courtesy of Beth over at Eat Within Your Means. HERE is the base recipe for the muffins and this YUMMY vegan, gluten free Chocolate Hazelnut recipe will be coming soon (I was doing a little recipe testing for her).
Lower shutter speeds= more light, more motion blurry, higher risk of a shaky photo
Higher shutter speeds= less light, less motion blur, lower risk of a shaky photo
The aperture, also referred to as the “f number”, pertains to the depth of field and how wide open your lens is when it is letting light into the camera. Quite simply, this is the thing that affects how much of your photo is in focus and how much is blurred.
Aperture is also the setting on your camera that gives that pretty bokeh affect that is so popular in photos these days.
A wide aperture (which is a lower f number such as f/1.8) means that your photo will have a shallow depth of field meaning that the background/ foreground will be out of focus. With a wide aperture, more light is able to get into the lens which results in a brighter photo. A small aperture (which is a higher f number such as f/ 14) means that your photo will have a wider depth of field meaning that more of the background will be in focus and it also results in a darker photo.
The below photos demonstrate what apertures look like at f1.4 all the way through f14.
 Please note that while I was changing the aperture, I was simultaneously changing the other settings in order to keep the lighting roughly the same in each photo. Had I ONLY adjusted the aperture, the photos would have gotten darker and darker and at f14, it would have been nearly a black photo.
These 2 photos were taken with the same ISO and shutter speed and the only difference being the aperture. Look what a difference just a few f stops make:
High aperture= lower f number, shallow depth of field, background out of focus, more light
Low aperture= higher f number, wider depth of field, background more in focus, less light
The ISO is the level of sensitivity your camera has to available light. A low ISO has a lower sensitivity to the light and vice versa.
2 very basic things to know about ISO:
a) raising your ISO means that your pictures will have more light in them
b) raising your ISO ALSO means that you will have more grain in your photo.
 Here is the difference that ISO will make:
Adjusting your ISO is a quick and easy way to take photos in low light situations. It’s my first go to setting when I need to bump up the light in my photos. However, my limit for food photos is ~800 before there begins to be too much grain for my liking.
Low ISO= lower sensitivity to light, darker photos, less grain
High ISO= higher sensitivity to light, brighter photos, more grain
All of that being said, these are the setting that I most commonly use to shoot food photography: 1/80, f2.8, ISO 200
Shutter Speed: My shutter speed typically hovers around 1/80. If it’s a dark day and I need extra light, I’ll go as low as 1/50 (people have told me that I’m crazy for going that low without a tripod but it works for me). If I’m doing a pour picture with motion, I’ll bump it up in the 1/200 range.
Aperture: My aperture varies depending on the food, the lighting, and my mood. I like pictures with rather shallow depths of field which is why almost all of my photos are taken in the <4.0 range. The only time I go above that is when I have something in the background (a product label for example) that I want to be more in focus in which case I’ll bump my aperture up to about a 7.
ISO: If I can get my iso as low as 100, I do it. That rarely happens though. I would say that on an average day, my iso hovers around the 200 range but if it’s a particularly cloudy day, I’ll go as high as 800 but no higher or else there will be too much grain in the picture for my liking.
The information here is really only a starting point. When I was learning food photography, there were 2 blogs that were SUPER helpful to me:
- Minimalist Baker. Dana used to have an ebook which I bought and found SO super helpful in improving my food photography. She has since replaced the ebook with her Food Photography School. I bought that as well and refer back to it quite often. This food photography program is a wonderful extension to everything that I have gone over here.
I LOVE her style and definitely wouldn’t be the photographer I am now without her guidance. I HIGHLY recommend her Food Photography School.

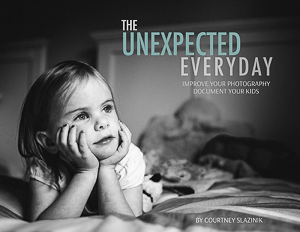
- Click it Up a Notch. Courtney’s blog is ALL about helping people improve their photography. I have found her posts SO so helpful and often refer back to her blog. She has a ton of great (FREE!) resources and I highly recommend poking around her blog for a while. Her ebook, the Unexpected Everyday, is great for beginners wanting to learn more about everyday photography including food photography, pictures of your kids, and really whatever. This is a great resource for learning more about manual mode and simply figuring out how to use your camera properly.

She also has a great ebook called The Styled Photographer which is all about helping you find your unique photography style. I’ve struggled with this for a long time (and still do a bit, honestly). Her ebook is so great for those looking to take the next step in their photography! I highly recommend it!
No matter how many times it was all broken down for me, it still took me a long time to really grasp all of this. I think that’s natural so don’t get frustrated. My best advice is to practice. Then practice a bit more and then when you’re done, keep practicing. I’m 3 years into food photography and I definitely still feel as if I’m learning new things about my camera and ways to use it.
One thing that helped me a LOT was to constantly switch back and forth between automatic and manual mode. I’d start in auto, take a picture, and see where I was. I would look at the settings that the camera provided in auto and then make adjustments based on what the photo needed (shallower depth of field, more light, etc). This helped me immensely for about 6 months before I got comfortable making the adjustments on my own.
I also suggest starting with one thing at a time. For about the first year of owning my first DSLR camera, I didn’t touch the ISO at all. Trying to fiddle with all three of these settings at once was just too much for me so I ignored it. When practicing, pick one aspect of the exposure triangle and just fiddle with that one setting to really learn how it affects your photos.
One final recommendation is to make yourself a simple cheat sheet to keep with you when you shoot. Something simple to remind you what each setting does. Remember:
Lower shutter speeds= more light, more motion blurry, higher risk of a shaky photo
Higher shutter speeds= less light, less motion blur, lower risk of a shaky photo
High aperture= lower f number, shallow depth of field, background out of focus, more light
Low aperture= higher f number, wider depth of field, background more in focus, less light
Low ISO= lower sensitivity to light, darker photos, less grain
High ISO= higher sensitivity to light, brighter photos, more grain
I hope that this was helpful!! I plan to do a few more posts similar to this one in the near future including an updated post with more “Food Photography Tip and Tricks for Beginners“.
Please feel free to email me at ANY time if you ever have a question. I LOVE talking photography and would be happy to help! I also offer photography lessons via Skype if you ever just want to have a one on one conversation about photography.
***Some of the links above are affiliate links meaning that if you end up buying one of the products, I’ll make a teensy profit at no extra cost to you. Don’t worry though, I’ll put the money to good use like buying a 100mm macro lens :)







This was an easy and great read with key points highlighted!! Thank you and wish me luck!!
Good tips thanks!
It’s a pity about the overwhelming ads in between and distracting the flow. It’s like webpage schizophrenia!
Photography is all about practice and learn. When you want to control over your camera you should shift to Manual mode. Let you decide what should be the settings. Very helpful article.
Photoshop?
This is the most comprehensive explanation I have read so far. Thanks for sharing.
Manual mode made crystal clear.
Best blog I’ve come across that breaks it all down with pictures and simple words. I’m now excited that I have a starting point! Thank YOU!
Thanks you for sharing…very helpful for me as beginner….maybe u can share a bit about focus point selection n manual focus…tq