
This post may contain affiliate links. Please read our disclosure policy.

Can I be honest? While I love cooking and creating fun new things in the kitchen, I might like the process of taking the pictures even more. Learning my way around my camera and the various editing software options has been an adventure. But, some of the most common comments/ emails/ questions that I get are about my photography and how I do various things with my photos.
Those always mean SO much to me because I’ve worked very hard over the past year to take and edit photos that I can be truly proud of.
I won’t pretend for one second to be anything more than an amateur photographer. There’s still SO much that I’m learning and SO much that I still want to do better when it comes to my photography. But, I will say that I have spent hours and hours over the past year practicing and reading and learning as much as I possible can about the subject. I’m obsessed with it and I love it!
Something I’ve been thinking about a lot lately is putting together a little series on my blog with photography tips for bloggers and beginners. Is that something that you would be interested in? What all would you want to learn??
To test this out, I’m going to show you a sneak peak into my editing process. FIRST of all, did you know that you don’t have to spend hundreds of dollars in order to download and use Photoshop and other Adobe products? Adobe actually offers a product called Creative Cloud that allows you to pay a monthly subscription (mine is only $10/ month) and gain full access to Photoshop and Lightroom from your computer. I wrote a post ALL about it HERE.
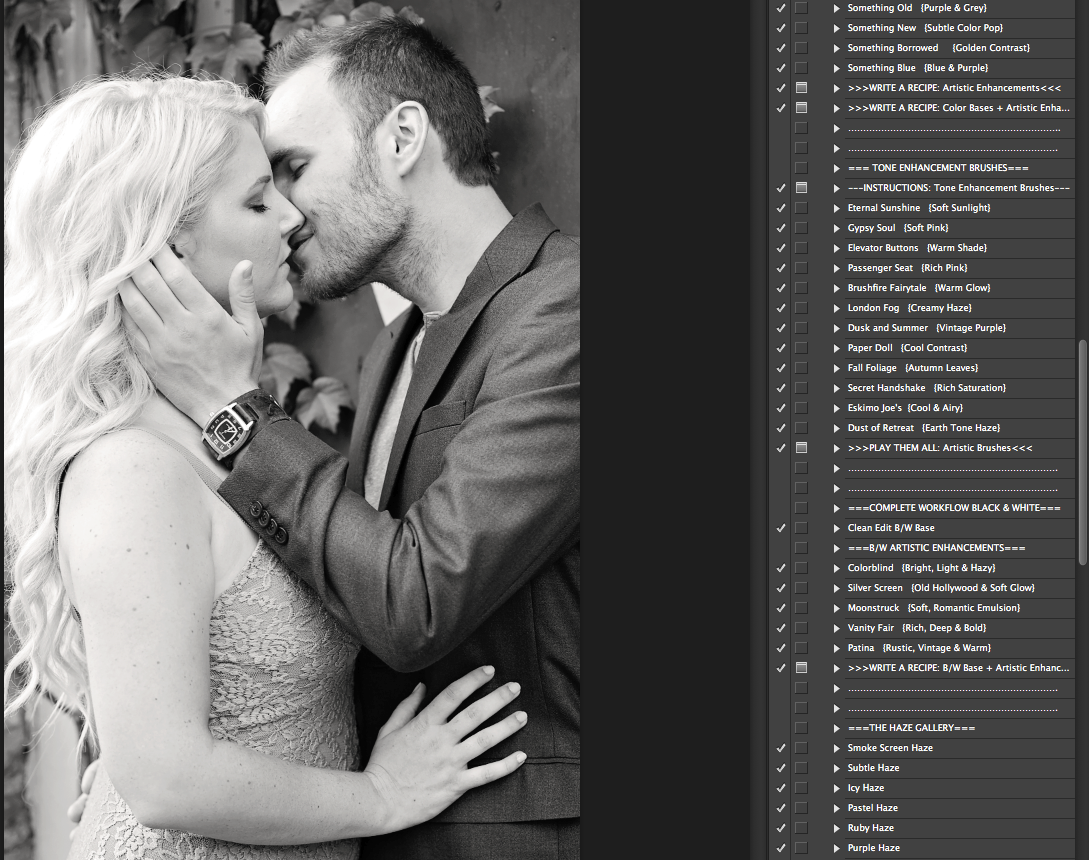
My editing process using the Greater Than Gatsby Actions:
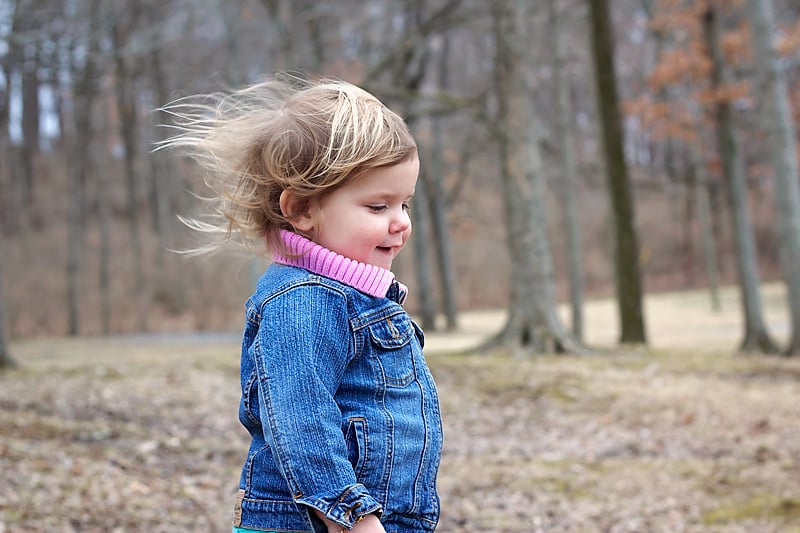
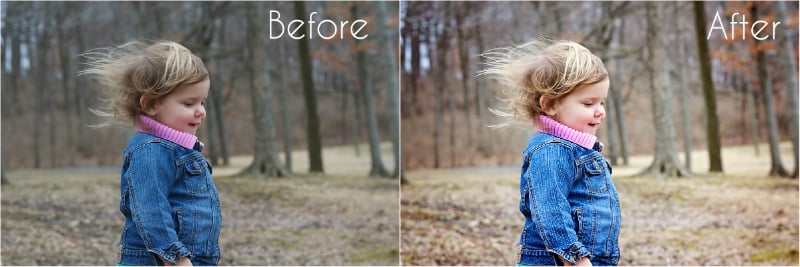
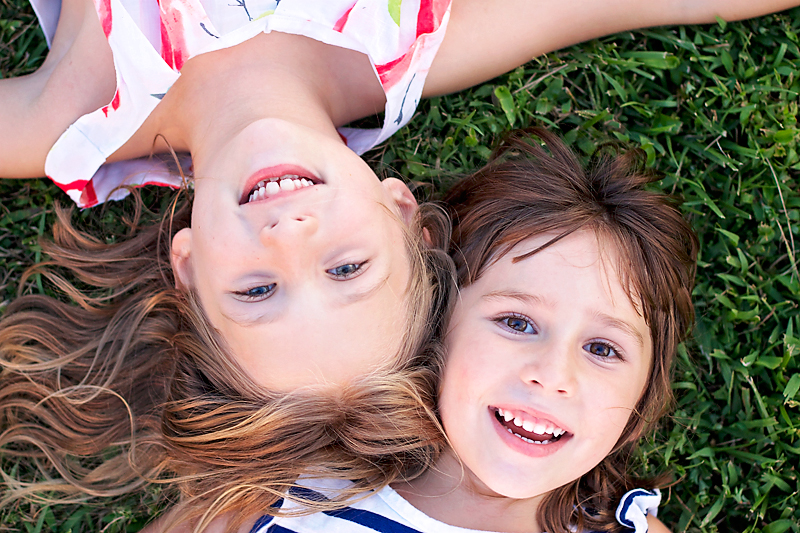
First I start with a raw image that’s SOOC (meaning it’s Straight Out Of Camera with no edits or alterations). This picture is straight from my camera:

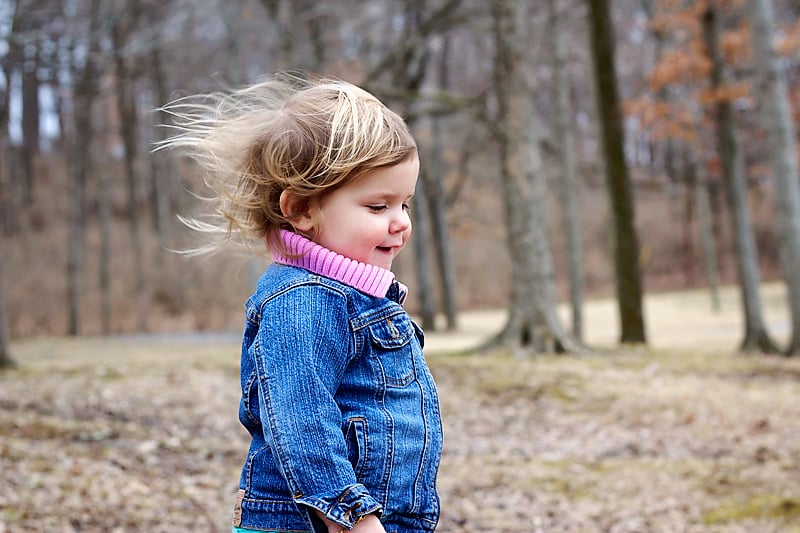
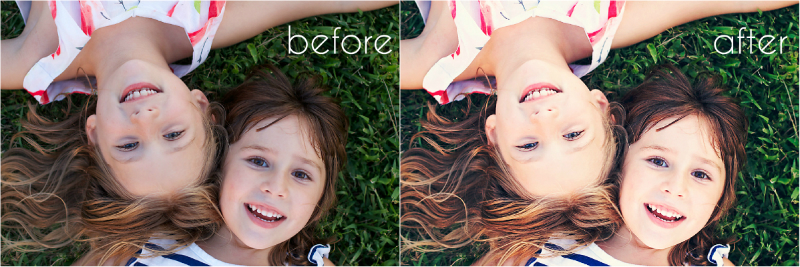
Using the Clean Workflow Action set, I run the Clean Edit Color Base action on the photo. I run this action on basically every single photo that I take with my DSLR. You can adjust the photo manually to get this same outcome but it will take a lot more time and fiddling around. I LOVE how quick and easy this is and it always makes such a positive difference in the photo.
This is with ONE quick click in Photoshop:
Many times, I stop there. The Clean Edit action cleaned the photo up, adjusted the light, smoothed things out, and really made the colors pop.
Sometimes, as in this case, I like to try out a few of the other actions to see if I like them on my photo. This particular photo was taken in March when it was very dull outside with little color around. I wanted an action to bring the photo to life a bit more.
This action (In Stark Contrast from the Radiance Collection) is only a subtle difference but really makes the photo catch your eye a bit more.
Then I added one more action (Flare for the Dramatic from the Radiance Collection, which is one of my favorites for outside photos):

The difference in the 2 photos isn’t huge but enough to differentiate a normal photo from one that really catches your eye. It really brings out the color in the leaves, the golden sparkle in her hair, and overall just makes it prettier!
This change is from just 3 clicks:
If you want to know more about these actions NOW, you can skip ahead to the end of the post. Greater Than Gatsby is running a special promotion through the end of September. Enter the code SEPT20 at checkout to get 20% off of your entire order.

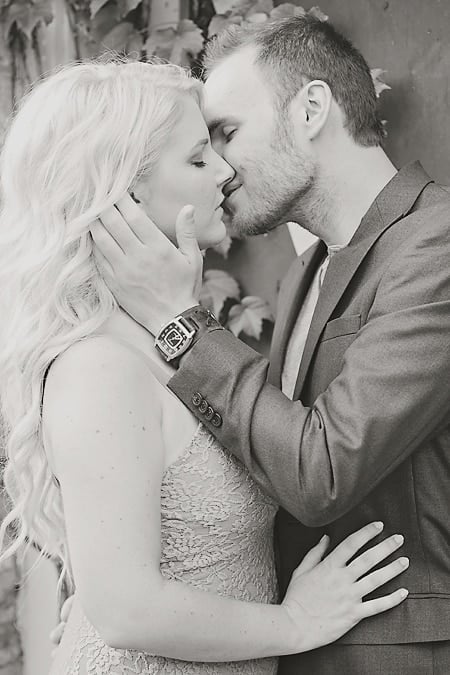
Here’s another SOOC picture I took recently (you can see more of this shoot HERE):

As always, I first run a Clean Edit action. But, I decided to go black and white on this one so I ran the Clean Edit B/W Base action.
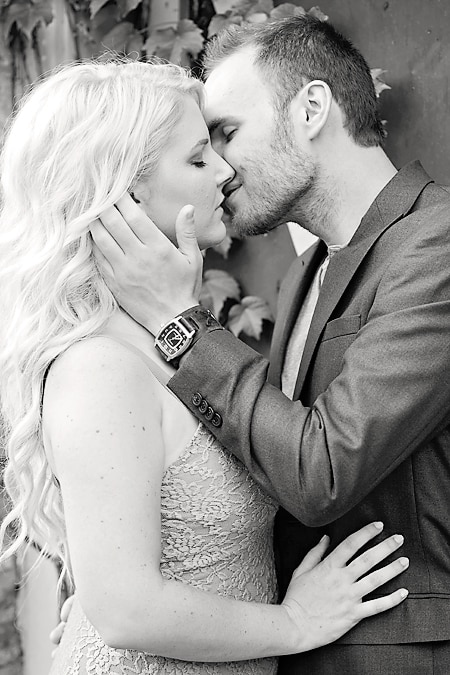
Again, I think this looks great as is but I wanted to give it a slightly more airy and romantic feel. After trying out a few different actions, I decided on the Moonstruck enhancement action which is also part of the Radiance Collection:
OK, last example of a quick clean edit, promise!! Another SOOC shot:
 After the Clean Edit Color Base Action:
Here is an action on the photo from the Woodstock Collection. I didn’t use this collection much when I first got it but lately it’s been my favorite one!

That last action was not necessary for a great picture but I still love it. Stephen said he thought the final result of this photo was a little too washed out. Luckily, it’s very easy to adjust the opacity/ strength of the actions in Photoshop/ Lightroom.
Sometimes I’m in the mood for very dramatic and bold pictures, other times I want airy and light photos or even really hazy photos. These actions give me the ability to try out different feels and looks for a photo without having to spend FOREVER messing with different levels and contracts and light etc.
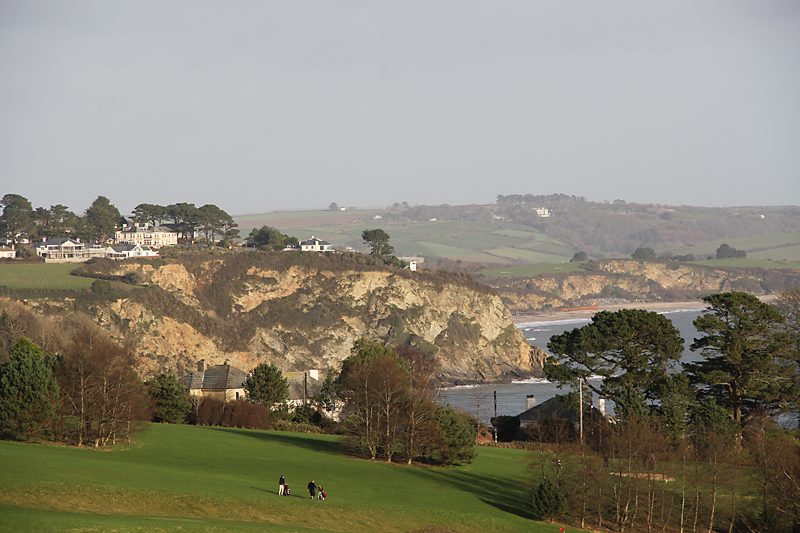
Another fun action that I like to use from the Greater Than Gatsby Collection is their cloud and sun burst overlays. Below are 2 examples, both from my cold and dreary trip to England earlier this year, where I used the cloud overlays to give my photo a brighter, cheerier look.
This photo is SOOC:
When you hit play on the cloud overlay action in Photoshop, a dialog box pops up with very clear instructions on how to apply the layer and adjust the photo to make the layer fit. This was super helpful to me seeing as I had no idea what I was doing the first time I used these overlay actions. There are about 10 different sky scenes that you can choose from. I chose this one and placed it where I wanted it:
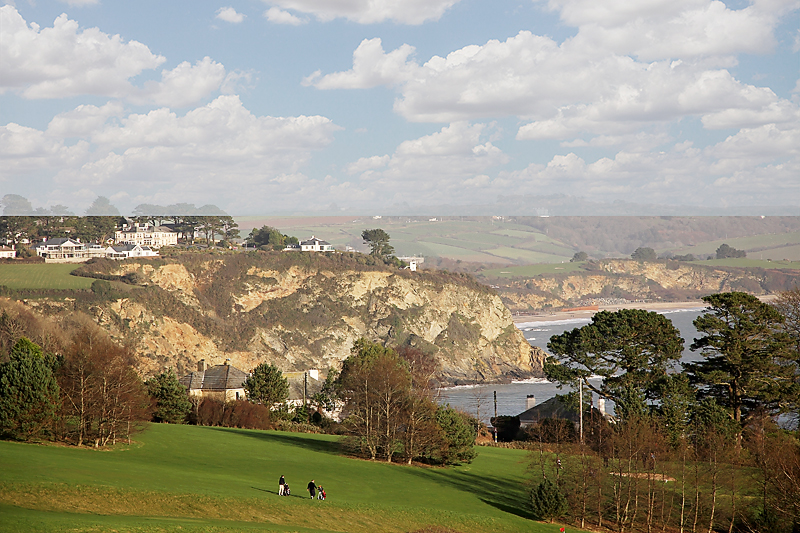
All you have to do from here is go in with the brush tool and brush the layer off of the areas that you don’t want it (ie the trees and mountains where there should be no sky).
I mainly added the cloud overlay as practice but was amazed at how drastically it changed the whole feel of the picture:


Another example using the London bridge. With a clean edit and a little fun cloud overlay action:

So, needless to say, I think the Greater Than Gatsby Actions are pretty amazing! :) If you’re interested in seeing some more before/ after photos and some step-by-step video tutorials, they have some great videos up on their site HERE.
They’re running a promotion through the end of the month that includes 20% off all Greater Than Gatsby Products with the promo code SEPT20. They just came out with a new set of actions called the Three Nails Collection and I realllly want them!!
If you can swing it, I highly recommend buying the whole collection all at once. However, if you’re interested in buying the actions but can’t afford to buy the whole bundle, I highly recommend buying the Clean Workflow set first and then the Radiance Collection.
If you have any questions about the Greater Than Gatsby actions, please feel free to email me or leave a comment below. I really do love these actions a lot and recommend them to everyone that asks me how they can improve their images in editing. More than anything, I love how easy they are and that they require very little knowledge of Photoshop or Lightroom.
Did you enjoy this tutorial?? I have quite a few more planned but I would LOVE love to hear what kinds of photography tips you would like to see. Tutorials I’m thinking of include ‘how to take and edit great photos with your phone’, ‘photography gear 101’, ‘lighting 101’, ‘mastering manual mode’, and more. Leave your suggestions in the comments and I will love you forever!
*This post contains affiliate links, which means that if you click on one of the product links and go on to purchase that product, I will receive a small compensation. However, your cost will remain the same (but be even better because of the discount!). I bought these actions with my own money and have used them DAILY for well over a year. Needless to say, I would not promote them if I didn’t absolutely love them.


Wondering if you are still using these actions as much now, years later? Also wondering if you use LR presets and why you use one or the other or both? Thanks
Hi Laurie! I do still use these…almost every single day. I’ve bought some of their newer ones that have recently come out as well. These days, I use Lightroom the majority of the time so I mostly use the lightroom presets. I simply find LR quicker and easier since I mostly just do simple edits to my photos. When I want to do some more artistic edits, I will use Photoshop.